As per the official RedHat documentation “Red Hat Enterprise Linux 8 delivers a stable, secure, consistent foundation across hybrid cloud deployments with the tools needed to deliver workloads faster with less effort. It can be deployed as a guest on supported hypervisors and Cloud provider environments as well as deployed on physical infrastructure, so your applications can take advantage of innovations in the leading hardware architecture platforms.”
In this guide, we are trying to cover step by step guide to install RHEL8 or CentOS 8 with screenshots.
In order to install the OS , first, you need to identify physical hardware or virtual resource. For learning purpose, you can also install on VirtualBox or VMware Workstation Player
System requirements
- A 64-bit x86 or ARM machine
- 4 GB of RAM
- At least 20 GB of available disk space
Download the DVD media
If you like to install and learn RHEL 8, we recommend creating an account on developers.redhat.com which enables you to download the RHEL8 DVD Here. Take note of the username and passphrase you choose, as you’ll need these later when registering your RHEL install.
If you would prefer to try CentOS 8, you can directly download the DVD media Here and select CentOS Linux and version 8
Installation
For physical servers that need a USB bootable, you can use an open-source tool etcher.
If you already got a Linux box, you could directly write to USB using dd command. “lsblk” command helps to find your USB device name, here in our example its /dev/sdX. Replace /ISO/ with the directory holds the DVD and /dev/sdX with the USB device.
Boot the Media
Once you have the bootable USB , ISO or DVD ready, boot the server. We are using CentOS 8.2 DVD media.

Step1. From the Boot menu , Select Install CentOS Linux8
RedHat installer Anaconda will get loaded and guide through the OS install

Step 2. Select your language and Keyboard layout

Step3. In this section, you can select the Installation Destination, Network configuration, Software selection, etc. Will go through Installation Destination, Software Selection, and Network a& Host Name in detail.

Step 4. Let’s select the Install Destination, Select the disk you want the install the OS, make sure you have Data backed up or ready to erase. You can choose Automatic disk partition or Custom. Automatic is the default choice for Storage Configuration. You can use that setting, but I suggest selecting Custom so that you can make your own layout and mounting choices, so select Custom and any other choices you like, and then click Done to proceed to the Manual Partitioning page
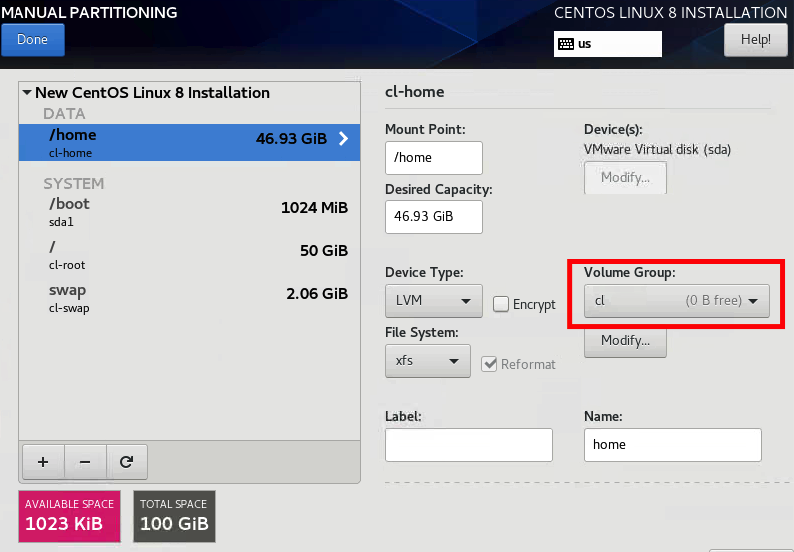
Step5. In Custom, LVM is enabled, also the file systems “/” , “/home” , “/boot” and “swap” get created. We can change the default volume group name, resize the filesystems or create more filesystems.
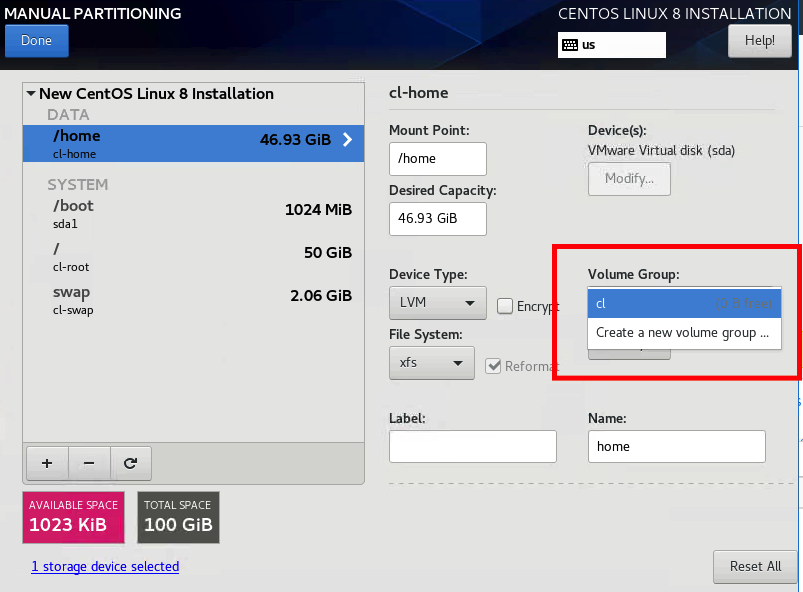


Step 6. We are adding /var , /tmp , /opt and resizing the other filesystems

Step 7. Once the LVM layout is ready , click Done. Click Accept Changes

Step 8. In the Software selection menu, you can choose Server with GUI , Server, Minimal Install etc. We are selecting Server with GUI

Step 9. In this step , we can change the hostname , Configure the IP and Name servers.

Step 10. To configure the IP , select the network interface(ens192) , Edit , To assign IPv4 or IPv6. You can choose DHCP or static (manual) . We are assigning an IPv4 IP address. Enter your IP address , Netmask , and gateway. Also you can add your Name Servers(DNS) and click to Save.
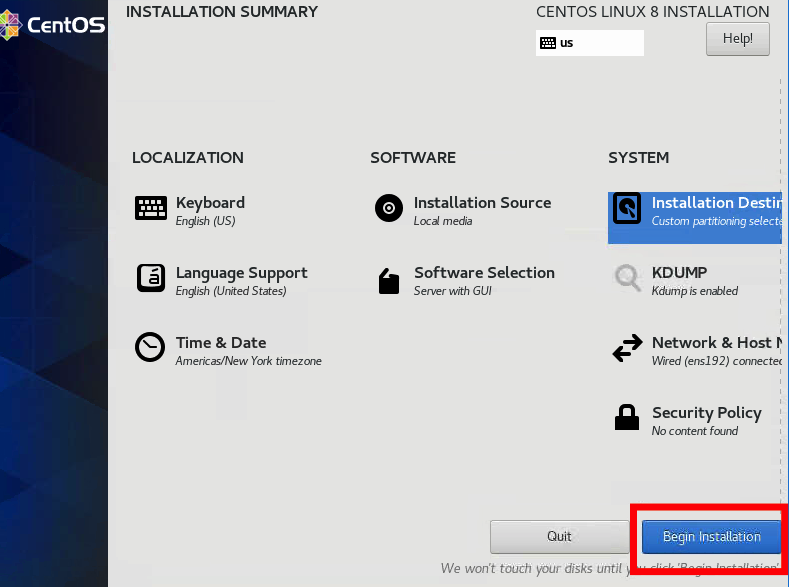
Step 11. Now we are ready for the Install to start. Click Begin Installation.

Step 12. While the OS get installed , we can setup the superuser root password and also create a user.


Step 14. OS install process completed and ready to Reboot.

Step 15. After your new system boots for the first time, you must agree to the license. Read through the agreement , click accept the licence agreement and Finish Configuration


Step 16. The server is ready , Login with the user ID and the password.
Hope you find this guide useful , please don’t forgot to share your thoughts.
Check this guide on How to use cockpit tool on CentOS 8 /RHEL8